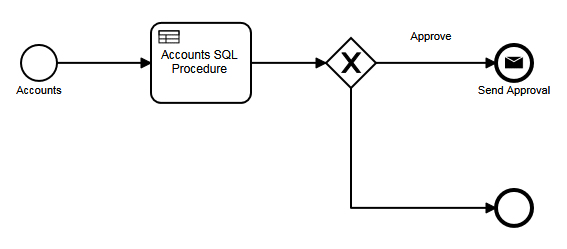
Custom SQL Procedure
An approval can be performed
by a SQL procedure to allow for a more complex calculation.
Step 1 – Drag the Start Event to the diagram

The name is optional, but it
is useful to specify the module. In this
case, the Accounts module has been selected and both new and existing records
will be processed.
For the module filter, the
Account Type is equal to Partner and the Account Type changed filter has been
included.
The SQL filter is displayed
for informational purposes. Changes in
this window will be ignored.
|

|
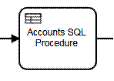
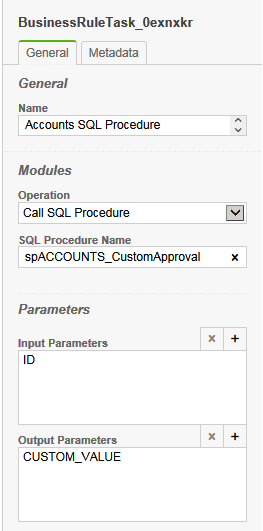
Step 2 – Drag the Business Process Task to the diagram, and connect
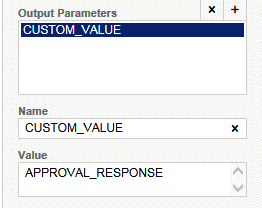
The operation is set to Call
SQL Procedure and the name of the procedure is set to spACCOUNTS_CustomApproval. The stored procedure can have multiple inputs
and outputs. The most common signature
is as follows:
Create Procedure dbo.spACCOUNTS_CustomApproval
      ( @ID                  uniqueidentifier output
      , @PROCESS_USER_ID     uniqueidentifier
      , @BUSINESS_PROCESS_ID uniqueidentifier
      , @BUSINESS_PROCESS_INSTANCE_ID uniqueidentifier
      , @CUSTOM_VALUE        nvarchar(50) output
      )
In this example, the input is
the ID of the record that started the process and the CUSTOM_VALUE output is
saved to APPROVAL_RESPONSE.
The APPROVAL_RESPONSE
variable is automatically created as a global for the process so that the value
can be used later.
|
|
Step 3 – Drag the Exclusive Gateway to the diagram, and connect

There are no settings on the
gateway. Instead, the settings are on
the paths out. With an Exclusive
Gateway, you can have many outputs, with one being the default. The default path out has no filter expression.
|
|
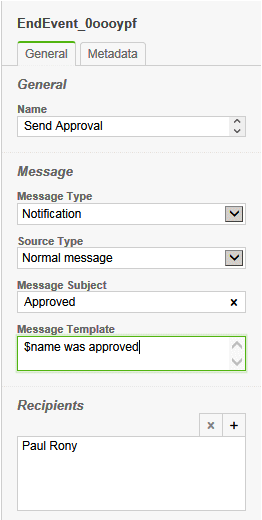
Step 4 – Drag the End Message Event to the diagram

The message type has been set
to Notification as we do not need to save this email in the CRM.
The source type is Normal
message so that we can specify the subject and message template here, instead
of having to create a message template.
In the Recipients list,
Managers were added so that all managers will get the notice.
|
|
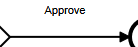
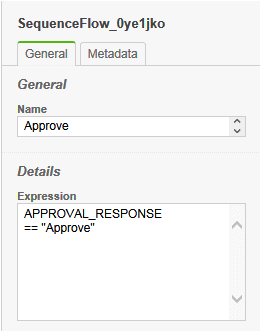
Step 5 – Connect the gateway to the end message and specify the filter
The filter that we will
specify will be the variable name we created above and the value
“Approve”. There are only two possible
values, Approve and Reject and in this case we want to send an email for the
approve path.
We use the double equal ==
here because this is C# syntax.
|
|
Step 6 – Drag the End Event to the diagram, and connect

The end event has no settings.
|
|
|